Friday, April 15, 2011

Lamb Kebabs

Adam and I decided last week that we needed to be a bit more adventurous in our cooking. The time has come to expand our limits a bit further and tread waters that have been previously unexplored in our little kitchen. In order to do so, we made the decision to purchase one item each week, be it a meat, spice, grain, vegetable, really anything will do, that we have not previously used, or at least not used very often or in a long time. So, last week while we were at the store we had a whole new task at hand: find an adventurous ingredient and we did just that when Adam threw ground lamb into the cart.

A few days went by and I kept thinking about the ground lamb that was sitting in our freezer. I had no idea what to make with it. I thought about lamb meatballs, but that seemed too easy considering we already make meatballs. I considered some type of pasta for awhile, but again, that didn't seem different enough from our regular routine. I thought about flatbreads, burgers, and basically anything that I had made with ground beef in the past, but nothing seemed right for our new experiment.

My memory then took me back to the several months that Adam and I both spent studying abroad in Fremantle, Australia (also the place where we "officially" first meet and started dating). There was this wonderful, little, hole in the wall place, where the owner barley spoke any english, but made one heck of a kebab. He had every kind of kebab you could imagine and each one was better than the last. He of course always had lamb kebabs. The perfect first recipe to start off our new adventure.

I was actually shocked at just how easy these kebabs were to make. It only took a few ingredients and a little bit of time. They are a great option for a weeknight meal when you need something in 30 minutes or less. Here is how I made ours:

I started off by combining the package of ground lamb, about 1/2 of an onion finely chopped, roughly 1/4 teaspoon of ground cinnamon, approximately 1/2 teaspoon of 9 spice curry powder (a great christmas present from my in-laws!), a little salt and pepper, 1/2 cup of Panko crumbs and 1 egg all in a large bowl.


With my hands, I mixed all the ingredients together until fully incorporated. You do not want the mixture to be too wet, otherwise it will be difficult to shape. If need be, you can always add a bit more Panko until reaching the right consistency. You also do not want it to be too dry. If it seems a bit dry, you may need a second egg. Once the mixture is complete, I simply formed long patties with my hands and placed the lamb on a baking sheet.


Now I would have preferred to grill the kebabs (and would have put them on skewers in that case), but we unfortunately have yet to purchase a grill for our new place - something I need to fix as soon as possible. I was stuck with the next best option which was the oven. I baked the kebabs at 425 degrees for about 17- 20 minutes. Halfway through the baking time, I drained off the excess oil that had accumulated and then flipped the kebabs to ensure that they would brown on both sides. Once fully cooked, I let the kebabs rest on paper towels to help extract any left over oil.


To assemble the kebabs I took whole wheat naan which I had toasted a bit in the warm oven, spread them with baba ghanoush hummus and then layered with the lamb, fresh tomato and spring lettuce.


This was a great start to our new adventure in cooking. The cinnamon and curry added just the right amount of spice, while still allowing the flavor of the lamb to come through and the kebabs themselves were almost too easy to make. A perfect week night meal and a perfect reminder of those great days in Australia. Now we just need to get back to Fremantle so that we can compare our kebabs to our favorite little vendor. Perhaps a trip to the land of Oz for our second wedding anniversary, Adam....?

Friday, April 1, 2011

Meatballs!

This day and age, woman are taught or pressured into believing there are certain meals they cannot or should not eat. My husband often reminds me of this when I say no to a particular food or dish, claiming that I do not like it. He will often call my bluff and force me to admit that I don't really even know if I like it, I just tell myself that so I won't want it. It is an interesting little trick that I have been unknowingly using for many years. For me, the following are some of the foods that I "don't like:"


1. Meatloaf - Although I did not try this gross-looking, bacon-encrusted, drown-the-flavor-out-with-ketchup, meat for many years, it is my husband's favorite meal and I have had to eat it once or twice since we have been married. I still do not like it. Perhaps part of the reason I still don't like it is because I believe it is bad for me, but I have given it a try and have been unable to come around. It stays on the list.

2. Hamburgers - growing up my parents did not take my siblings or me to McDonald's, Burger King, Wendy's or any of those other fast food hamburger joints (as an adult, this is something I am actually happy about and a habit I have kept). The only time we frequented these chains were on road trips and the majority of time we ended up at an Arby's where they serve "Market Fresh" sandwiches and salads. Although, I do recall that, after my tonsils and wisdom teeth were taken out, my mom brought me a Wendy's frosty. Those I like - and have no problem eating! (Sometimes, I even dip Adam's french fries in my frosty. Don't judge me; it's awesome). However, you will rarely find me ordering a hamburger and if I do it is usually of the turkey, quinoa or veggie variety. And I really do prefer those. Sorry Adam, it's true. (Although, your grilled burgers - the ones you learned from your Dad - with the worcestershire, soy sauce & garlic powder ... I'd happilly order them anytime).
3. Chipotle Burritos - Yes, I have tried them. And although most people stare in disbelief when I say I don't like them, it is true! And, I really do not like how I feel after eating them. Yes, I will admit, the fact that there is a whole day's worth of calories in just one burrito has probably influenced my taste buds. This is my husband's favorite item to argue with me on the whole "taste vs. health reason" for not eating something.
4. Real potato chips - I am more than happy to stick to the baked variety. They even taste better.
5. Bologna, Salami, Pepperoni and any other deli meat speckled with fat - overly processed, overly gross.
6. Mayonnaise - You will never find this condiment spread on a sandwich of mine. The only time I use it is as a part of a larger dish and even then, I use the light stuff. (See also: ranch dressing. Never bought it. Never will.)
7. Regular Soda - I do think it has a weird flavor, but again, I probably convinced myself of this because I know it is unhealthy. Pregnancy has, however, cured me from even diet soda. I haven't had a sip in the last 28 weeks.
8. Creamy Soups - I avoid them like the plague. I am perfectly happy sticking with broth based soups.
9. Prime Rib - I honestly really don't know if I like this or not, and since I cannot recall the last time I even had it, it makes the list.
10. Meatballs - This one I use to avoid just because I did think it was bad for me. Whenever I had meatballs, they were so rich and decedent that I knew they just had to be bad for me. Although they tasted great, my mind kept winning the argument. But....

Over the years, the more meals I have made, the more I have come to realize and appreciate that you do not have to avoid certain dishes or foods, you just have to prepare them in your own healthy way. More often than not, I even find that the healthier version tastes better. My husband has been really pushing some of the above items lately, convinced (and supported by scientific fact) that if I eat them while pregnant, our baby girl will be more likely to enjoy them when she is born and thus, as a result, he will have a partner in crime. He has requested and been denied meatloaf multiple times this year (a disappointment he took into his own hands last weekend; making and eating a whole meatloaf while I was away for the weekend). Worse yet (at least for him), I have not had any bizarre pregnancy cravings that make me want to eat any of the above items. He was really hoping that the pregnancy gods would grant him that one wish...

Last weekend though, I flew to Kansas City for a wonderful baby shower put on by my sisters. My oldest sister, Erica, created a collage of pictures of both Adam and me when we were babies. And this was one of pictures she used:

When I saw this picture of Adam eating spaghetti and meatballs as a little kid, my heart melted. He had been denied meatballs for far too long. His unborn baby girl deserved the chance to determine for herself if she liked them too. So, on Wednesday night as he and his very own "League of Dorks" (if you are a Sports Guy fan, you know what I mean by this), began their fantasy baseball draft, I happily whipped him up some meatballs and quietly served them to him, so as to not interrupt the ridiculousness that is him, his friends and their weird song about Julio Lugo.

This meatball recipe was actually discovered by Adam while watching Throwdown with Bobby Flay. He made them for me during several attempts to persuade me to take them off my list of banned food. And being the understanding husband that he is, he even agreed to my adaptations of the recipe so that it met my "healthy" standards.

So here are our very delicious version of a healthier meatball!

Preheat your oven to 350 degrees and grease two baking sheets.

In a large bowl combine 1 pound of lean ground beef (you can use a mixture of other lean ground meats if you would like, however, we have discovered that using just beef - as opposed to, say, beef and ground pork - provides the best flavor), 1/2 cup of italian flavored bread crumbs, 4 large eggs, 1/2 cup of skim milk, 4 oz of parmesan cheese, 1/2 of an onion coarsely chopped, about 2 oz of chopped fresh parsley and 3 oz of chopped fresh basil.


With your hands, mix all of the ingredients together until fully combined. You are looking for a certain consistency with these meatballs. You want enough breadcrumbs so that they will stay together, but also enough liquid so that the meatballs are moist and delicious once baked.


Once fully mixed, shape your meatballs to the size of a golf ball or a bit larger. Place on the greased baking sheets.


Bake for about 35 minutes or until cooked all the way through. Do not over bake though!


While the meatballs are baking, make your pasta sauce in a large skillet. If you are short on time, feel free to use a jarred pasta sauce of your liking. To add a little something extra to the jarred sauce, use this simple trick that I learned from Ina Garten: chop up and saute an onion, and then add the jar of (preferably good) pasta sauce. The sauted onion brings out an extra element of flavor in the sauce. Once the meatballs are cooked, transfer them into the skillet along with your pasta sauce and continue cooking for another minute or so.


Serve with chopped basil and a touch of parmesan cheese.


This healthy meatball recipe has won me over and removed meatballs from my list of "bad" foods. Now, I cannot wait to make them for my daughter, and capture a picture of her enjoying them just as her Daddy did when he was young.

Wednesday, March 30, 2011

Lenten Meal: Baked Pasta

Once a month, I am graced with the wonderfulness of a great mail day. No, it is not that rare day without bills (although that is very nice), and no it is not due to a special letter from a long time pen-pal (I would first need to find that pal); no, it's the day when my favorite cooking magazines arrive, a day that truly is like Christmas morning. From the moment I open that little gray door that keeps our treasures locked inside, I can see them folded up neatly and just waiting for my attention. On the way up the stairs, I stare intently at the insanely detailed photos that grace the covers, and hungrily read every headline, waiting until I am safely in our condo before pouring over every page. Last month was no different, my magazines arrived and I was hooked until they had been read cover to cover.

Half way through Bon Appetit, I discovered a full spread called "Melting Pots." Eight pages, of rich, comfort food all consisting of only baked pastas. I wanted to try each and every recipe, immediately, but one in particular stood out as the perfect no meat on Fridays lenten meal: Rigatoni with Eggplant and Pine Nut Crunch. So instead of turning to eggs or fish on Friday, I went all out with my latest most favorite pasta dish.

Rigatoni with Eggplant and Pine Nut Crunch (adapted from Bon Appetit):

First, begin by preparing all of your ingredients. Wash and chopped 2 medium sized eggplants, 2 yellow bell peppers, and 2 cups of cherry tomatoes. Preheat the oven to 425 degrees. Place all of the chopped vegetables on a large baking sheet and drizzle with olive oil. Sprinkle with salt, pepper, a little basil and oregano. Bake until the vegetables are roasted and soft.


While the vegetables are roasting, combine 2/3 cup of basil, 1/2 cup of parmesan cheese, 1/4 cup of pine nuts, and a dash of salt in a processor and blend.


In a large bowl, add 1 large can of whole tomatoes with their juice, 8 oz of heavy whipping cream, and an additional cup of basil. Blend with an immersion blender until smooth and creamy. Set aside until later.


Bring a large pot of slightly salted water to a boil. Add in 1 pound of rigatoni and cook until al dente. Once cooked, drain and pour pasta into a large baking pan.


Add the roasted vegetables, the tomato sauce and 1/2 cup of parmesan cheese to the pasta. Stir until combined.


Chop up some fresh mozzarella cheese to add on top of the pasta and pretend to not see when your husband sneaks a few pieces.


Sprinkle the pasta with your basil and pine nut mixture as well as the fresh mozzarella.


Bake for approximately 30 minutes or until the cheese is bubbly.


There are still 4 meatless Fridays (tomorrow being one!) left in this lenten season. So, if you are looking for something amazing to spice up your Friday night, this Bon Appetit recipe is the one to use. It is just that good and unlike the regular, old pasta dishes most of us so often turn to. The basil and pine nut mixture makes this whole dish stand out in a class of its own, so much so that I almost felt guilty for enjoying my meatless Friday so much.


So enjoy, on a Friday in lent or any other day of the year. And have no fear, the next great mail day should be coming soon.

Friday, March 18, 2011

Happy St. Patrick's Day

I am about as Irish as they come. And I have both of my grandmothers to thank for that. Mary Ryan and Claire Moriarty ensured that March 17th would always be a special day for my family and me. And if being Irish was not enough, I of course went to Notre Dame, the most Irish Catholic school in the country, own more green t-shirts than the leprechaun, can do the jig, and scream "Go Irish" more days of the year than not. It's in my blood, it's in my heart, it's who I am.

With all that though, I somehow have never come to appreciate corned beef. Year after year, I stick my nose up at that pink colored meat, never getting too excited for any St. Patty's Day celebration knowing that I will spend the majority of the event hungry and praying that a salad will be served alongside my least favorite food. I really do not know where my dislike of corned beef came from. Perhaps I had a bad experience with it at one point in time and have blocked out the memory, leaving nothing but negative feelings and a gag reflex. Or perhaps just because we were not served corned beef as children, I therefore have come to believe that I do not like it. I am really not sure, but what I do know is that I have been avoiding it for 26 straight years.

This year though, I received a formal request for corned beef. I have to admit, my husband (knowing my dislike) was pretty sly. He submitted it the Monday before St. Patrick's Day from the safety of his office, while I was cruising some 35,000 feet above land. He embedded his plea at the very bottom of an email as if it was nothing and in hopes that I would not really notice with all the other items he had rattled off before reaching his real point. He simply asked "Will you please make corned beef on Thursday?" Had I not been harboring feelings of slight guilt for leaving him home alone and stuck working long days and even longer nights, while I jetted down to Florida for a family event, I probably would have said no. But my guilt was still lingering and I found myself at Whole Foods picking out my least favorite meat.

Having never eaten more than a bite of corned beef, let alone made it, I felt a little overwhelmed by the task at hand. I read through several recipes and took ideas from each to create our feast. The first thing I realized was that nearly every recipe called for the meat to brine for a minimum of a week. It was already Monday, and the dinner was expected to be served on Thursday, so 3 days would have to work this time. To create my brine I boiled a large pot of water with an ungodly amount of salt and about 1/2 a cup of brown sugar. Once the water had begun to boil, I added in peppercorns, cloves, all spice, and about 6 bay leaves. After the salt and sugar had dissolved, I then removed the pot from the heat, and began adding ice cubes until it returned to room temperature. From here I simply added my meat to the pot, covered it and threw it in the refrigerator for the next 3 days.


On Thursday, the real fun began. I removed the meat from the brine and trimmed off the majority of the fat. I then placed the meat in a dutch oven and covered entirely with water.


To the pot I added a can of Ale beer, a handful of cinnamon sticks and bay leaves, red pepper flakes, black pepper, and cloves. I then chopped up an onion and a half and threw that into the pot as well.


I brought the pot to a boil and then reduced the heat and let it boil for the next six hours, adding a little more water as needed.

Towards the end of those six hours, I chopped up my carrots and potatoes to later be baked with the beef.


I also mixed up my rub for the meat. I combined 1/4 cup of brown sugar, a little bit of mustard powder, ground cloves, ground ginger, sea salt and freshly cracked black pepper. I mixed those together and set aside until the meat was ready for the oven.


Meanwhile, I boiled the potatoes and carrots so that they would be soft and just need to crisp up in the oven.


Once the meat was extremely tender, I transferred it along with all of the onions into my baking pan. I covered the meat with the dry rub and surrounded it with the cooked potatoes and carrots. I seasoned the vegetables with sea salt, black pepper and a little bit of onion powder, before placing in a 325 degree oven.


I let the meat and vegetables bake for about 25 minutes or until the potatoes and carrots were crisp and golden.


After allowing the meat rest for several minutes, I let the husband join in the fun and thinly slice the meat. Note: I also removed the excess dry rub from atop of the meat before serving. I found that it was a little too sweet for my liking. In the future, I will probably make only about half of the rub. Although tasty, I wanted a more savory dish and found the rub to be just a tad too sweet.


I served my first ever corned beef along with the onions, carrots and potatoes and zucchini bread (recipe below).


Much to my surprise the husband requested zucchini bread with this meal instead of the more traditional Irish Soda Bread. I was happy to oblige him, especially since it was quick and easy to make and left our whole condo smelling wonderfully of cinnamon (I used the Joy of Cooking recipe, but added whole wheat flour).

To make the zucchini bread first grate 2 medium sized zucchinis.


Combine 1 cup of flour, 1/4 cup of whole wheat flour, 1 teaspoon of baking powder, 1 teaspoon of baking soda, and 1/4 teaspoon of cinnamon in one bowl.


In a large bowl, combine 3/4 cup of sugar, 2 eggs, 1/2 cup of vegetable oil, 1 teaspoon of vanilla, and 1/2 teaspoon of salt.


Slowly add in the dry ingredients and mix until completely blended. Add in the grated zucchini and pour into a greased loaf pan. Bake at 350 degrees for 45 minutes.


I have to say that I think my first corned beef was actually a success! I had feared a total disaster and had even planned a back-up meal just in case. But I was pleasantly surprised with our St. Patrick's Day feast, and even found myself enjoying the food rather than wishing it was some other holiday. Although I do not think I will make corned beef throughout the year, I know we have now started a new St. Patrick's Day tradition; one that will make my grandmothers, both Ryan and Moriarty, proud every March 17th from here on out. And I know my husband is pleased that his wife is now willing to make one of his favorite meals.


And just because it is March Madness and in my blood GO IRISH! Take us to the final four!

Wednesday, March 2, 2011

For Mrs. Bennett

One of my all time favorite people called me last week with a dilemma. She said that after she gets home from a long day of work her husband never fails to ask what she is making for dinner. Her response to him? "You can microwave just as well as I can, honey." She told me that she needs an easy dinner option, preferably chicken, that she can throw together after work and does not involve the use of a microwave. I believe her request also included that I not use the word "mince" or "any other fancy cooking terms." So for my all-time favorite Lenexa couple, here is a very simple chicken dish that will please the taste buds of both 30 year old men and 3 year old boys (it has been Adam taste-tested and approved), and I promise, there is nothing fancy about it.

What You'll Need:
1 package of boneless skinless chicken breast
Flour
1 Egg
Milk
Panko Crumbs
Dijon Mustard
Honey
Black Pepper
Salt
Cayenne Pepper (optional)
Paprika (optional)

Step 1: Preheat the oven to 400 degrees. Slice the chicken breasts into strips. They do not have to be uniform, so don't worry about that.

Step 2: Put a little flour seasoned with salt, pepper and Cayenne pepper in one bowl. In another bowl, beat one egg with a tiny bit of milk. In a third bowl pour about a cup of Panko crumbs.


Step 3: Place each piece of chicken in the flour bowl and cover. Next coat it with the egg mixture and finally cover it with Panko crumbs. Place in a pan or on a cookie sheet and repeat until all of the chicken has been breaded.


Step 4: Bake for 20-30 minutes (depending on the thickness of the chicken), flipping halfway through, until the chicken is fully cooked and the Panko is beginning to brown.


While the chicken is cooking, quickly stir up a very easy at home honey mustard sauce. Start with about 2 tablespoons of Dijon Mustard. Add to that about 1 tablespoon of honey. Season with a little sea salt, fresh ground pepper and paprika (if you like a little kick to your honey mustard). This is literally a taste and see kind of sauce, so once all the ingredients have been mixed together, take a taste. If you want it a little more sweet, add more honey; a little more tangy, throw in more mustard. Literally, season to taste until it meets your requirements with the salt, pepper and paprika. You absolutely cannot go wrong, so have no fear.


Once the chicken is done, serve it with any sides of your choosing and the honey mustard sauce. I served it with rice, sauteed spinach and a little lemon poppy seed bread that I had made earlier in the day. But feel free to make it with potatoes, salad, or any vegetable of your liking. Again, you cannot go wrong!


And Brad, you can even tryout your mad microwaving skills on the leftovers the next day. Happy cooking! See you both in 3 weeks!

Tuesday, February 15, 2011

Something with Pumpkin for My Valentine

It was five years ago that I made my then boyfriend, now husband, pumpkin cookies. I think at the time he was a little skeptical of what pumpkin was doing in a cookie. Apparently, up until that point in his life, pumpkin came out only once a year and in the form of a pie, never a cookie (unless of course it was a pumpkin for carving). He tried my pumpkin cookies though, and after just one bite declared his love for those pumpkin cookies, crowned them King of all cookies and now request them throughout the year regardless of the number of months that separate us from Thanksgiving. Five years ago, I had no idea that I had created a monster, a pumpkin loving monster, who over and over again request “something with pumpkin” whenever I ask him what he would like for a particular occasion.  
As Valentine's Day rolled around this year, I knew I wanted to make him a very special meal, one that would show just how much I love him and how thankful I am that he is my Valentine, not just on February 14th, but every day of the year. But when I asked him if he had any special request for his Valentine’s Day dinner the only thing I got out of him was “something with pumpkin.” No decadent chocolate soufflé, no chocolate candies in the shape of hearts, nothing that had anything to do with romance, love or anything Valentine’s Day related. He wanted pumpkin. I should have suspected as much seeing as how on his last birthday he did the same thing and requested a Pumpkin Cake rather than a traditional birthday cake (darn those pumpkin cookies). But no, I was caught off guard once again and needed to come up with “something with pumpkin” that was worthy to follow the beef tenderloin with red wine mushroom sauce, mushroom risotto, broccoli and rosemary bread dinner that I had planned for that evening. 


We didn’t need another course added to our meal, so pumpkin soup was a no go. I was already planning on mushroom risotto, so pumpkin risotto wouldn’t work. Dessert was the only course remaining that I could squeeze in something pumpkin. I couldn’t make pumpkin cookies though, they were already made too often and just not elegant or special enough for this occasion, no matter how tasty they were. Pumpkin Pie was out of the question, it just didn’t feel right. I had already made Pumpkin Cake with Maple Frosting for his birthday and really did not feel like repeating myself. So in desperation I turned to my favorite culinary reads and once again was not let down. Fine Cooking provided me with the perfect “something with pumpkin” recipe that was elegant, simple to make and added the perfect touch to our Valentine's Day's meal: Pumpkin Cake with Sage. 


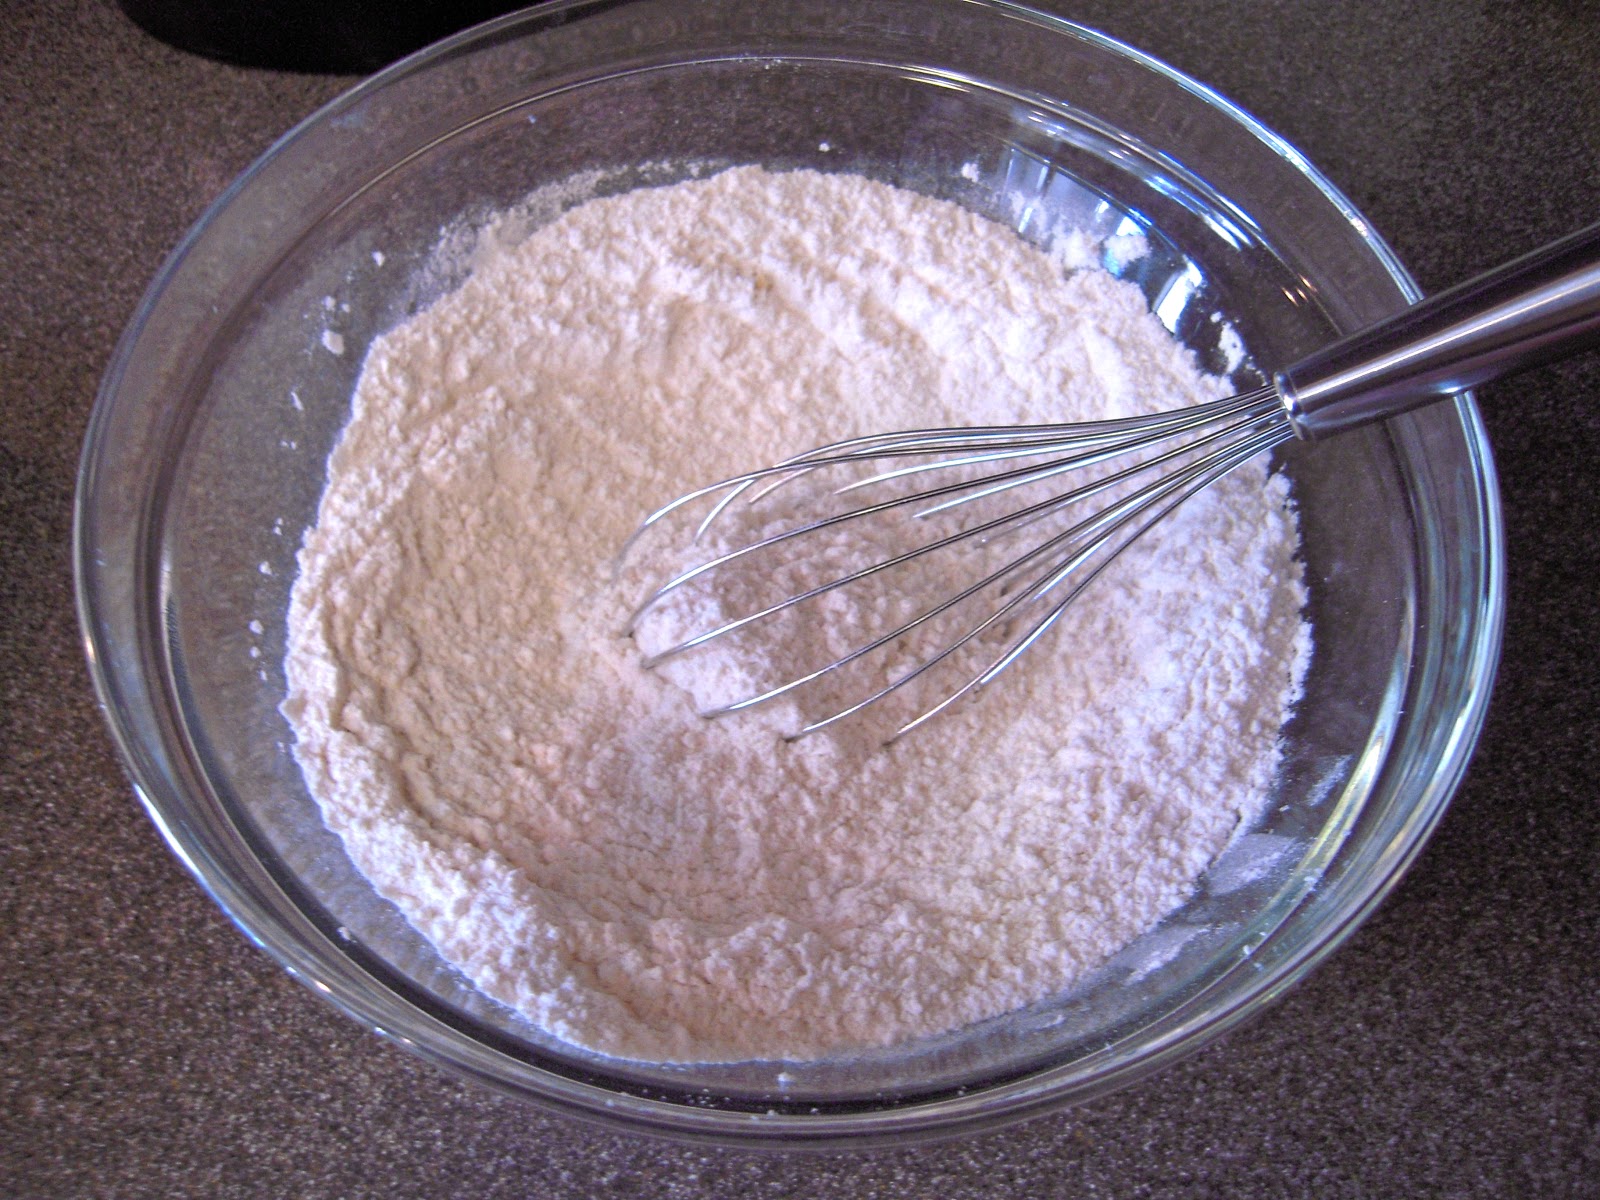
I started off by combining all of the dry ingredients into one bowl: flour, baking powder, ground ginger and salt.


Next, I melted a stick and a half of butter and freshly chopped sage in a small sauce pan.


Once the butter mixture had cooled, I combined it with a cup of sugar, a cup of brown sugar, fresh pumpkin puree, 3 eggs and a splash of vanilla. 


Next, I gradually added in the flour mixture and stirred until combined.


Finally, I scrapped the batter into a greased bundt cake pan and baked at 375 degrees for about 45 minutes. 


Once the cake had cooled, I removed it from the pan and decorated with with fresh leaves of sage. 

Although completely unexpected, this "something with pumpkin" was a great addition to our Valentine's Day. I had been worried that a pumpkin dessert would not be special enough on the day ruled by chocolate and I really wanted to make the perfect dinner for my very deserving husband. So as he took his first bite, I watched in great anticipation. My Valentine fell in love though and said it was even better than his pumpkin birthday cake. He is somehow already trying to determine when he can request this cake again... Memorial Day, 4th of July, some random day in March? In the meantime though, he has plenty of leftovers to keep this Valentine's Day going for the rest of the week. 

Happy Valentine's Day to all! And to my Valentine, thank you for being mine. 

Wednesday, February 9, 2011

Super Stitions, Super Meal, Super Bowl

I have a somewhat superstitious husband. If one of his teams loses while he's wearing a particular shirt, he won't wear it again for the rest of the season (sorry "baby blue Malkin", so long "6th Seed"). If a game's unfolding poorly, he'll quickly switch seats, and trust that by doing so, he'll have some direct, karmic influence on the outcome. During Steelers games, he's particularly intense. He nervously clenches, then furiously waves his ratty, and increasingly misshapen Terrible Towel. And, for some bizarre reason, he refuses to wash it until the end of the season. By Week 17, the thing is disgusting ... you seriously have no idea. A season's worth of sweat, sauce and saliva, all stained on a faded yellow rag. I have contemplated sneaking it into the wash before, but always decide it's just not worth it. So last week when I was asking him to submit his request for his Super Bowl meal, he reminded me that two years ago I made pulled pork sandwiches for the Super Bowl and what happened? The Steelers won their sixth ring. So obviously I would be making pulled pork sandwiches again this year to ensure the Steelers their seventh title. My pulled pork was 1-0, and you just don't mess with a winning combination.

So for Super Bowl Sunday, after all food requests had been submitted, this was our menu:

Appetizer (to be served during the 1st quarter): Mushroom and White Cheese stuffed Pierogies
Main Course (to be served at halftime): Pulled Pork Sandwiches and coleslaw
Dessert (to be served during the 4th quarter): "Black and Yellow" Ice Cream Sandwiches 


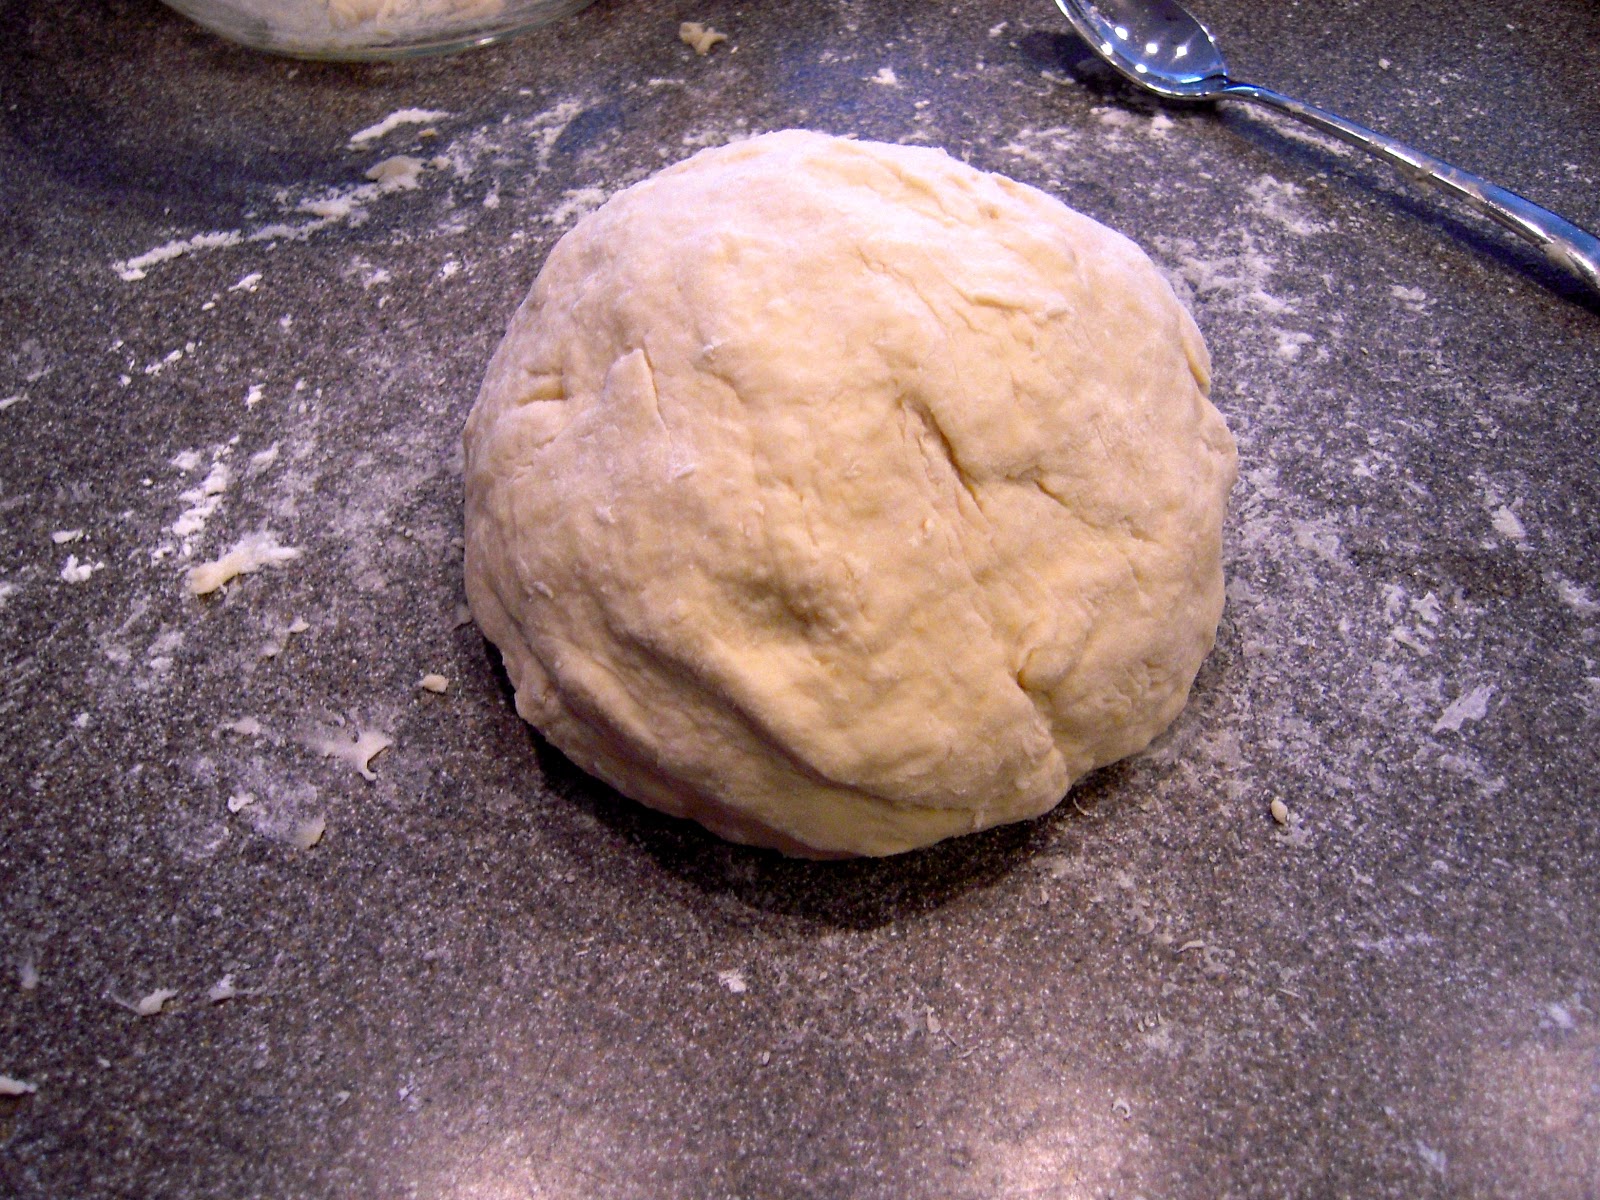
I had never made pierogies before, so I was anticipating a challenge with our appetizer course. I started off by making a basic pierogi dough. I combined 3 1/2 cups of flour, 3 eggs, a little bit of sour cream and about 1/2 a cup of water into a large bowl. After stirring the ingredients together, the dough was still dry and flaky, so I gradually added another 1/2 cup of water until the mixture came together.


Next, I floured the counter top and began to knead the dough. I continued doing so until it was smooth and only slightly sticky (which should take no more than five minutes).


I wrapped the dough in plastic wrap and left it on the counter to rest for about 20 minutes. In the meantime, I got a head start on the pork by preparing a dry rub.

For my rub, I wanted something full-flavored with a touch of heat. I combined brown sugar, Hungarian paprika, cayenne pepper, salt and black pepper in a small bowl.


Next, after trimming off a little bit of the excess fat, I coated the pork with the rub until it was completely covered.


 I then sautéed an onion in the dutch oven before adding in the pork. 


Next, I added about 1/3 cup of Apple Cider vinegar, a little bit of tomato paste, Worcestershire sauce, Dijon mustard and about 1/2 a cup of barbecue sauce. At this point, all the hard work was done and there was nothing left to do but allow time and low heat to work its magic.


Once the meat was cooking away, it was time to whip up the filling for the pierogies. I was not a huge fan of the idea of (the more traditional) potato-filled pierogies (wrapping one starch in another seemed a tad excessive, and a bit filling for a mid-evening appetizer). Since my husband agreed to trying something a little different, I decided to go with a mushroom and cheese filling. I began by cleaning and chopping up a whole package of mushrooms. I sautéed those just until soft.


I then shredded about a cup of aged white cheddar, which we picked up at Milwaukee's MetroMart. 


I combined these two ingredients into a bowl and seasoned them with a little black pepper, salt and onion powder, then set aside until it was time to fill the pierogies. 


I then set off to roll out and shape my pierogies. This would have been the perfect opportunity to break out my new pasta machine that I got for Christmas, but I kept thinking to myself that I could handle this all on my own. Well, I could, and I did, but because of this, my pierogies ended up a little on the large side. Next time, I think I'll try the pasta machine and see if it makes a difference.

To shape the pierogies, I took about a tablespoon or so of dough rolled it into a ball and then rolled it out on a floured surface into the best circle I could with a rolling pin (be sure to cover the finished dough with a towel to avoid drying out). I did this over and over again until all the dough had been used.


It was finally time to fill the pierogies. I did so by taking a spoonful of my mushroom and cheese filling and placing it in the center of the dough. 


I then folded it in half and enclosed the edges by pinching the sides together. I repeated this step until all of the pierogies had been filled and sealed.


When Christina Aguiliera forgot the words to the National Anthem, I took it as my cue to cook the pierogies. To do so, I brought a large pot of water to a boil. Once it was fully boiling, I added in the piergoies and allowed them to cook until they had been floating at the top of the water for about 4 or 5 minutes. 


After all of the pierogies had been removed from the water, I heated up a little bit of olive oil in a sauté pan. I wanted my peirogies to have a little bite, and a nice outer crisp, so I sauteed them for a few minutes, before finally seasoning them with a little bit of black pepper, and serving them to my ever so anxious husband. 


And.... they were a hit! Although Adam said so with a little bit too much of surprise in his voice, I knew they were a success when there were no leftovers. Sautéing them added a wonderful texture and the white cheddar provided a rich flavor that really made the filling stand out. The only thing I need now is to master is how to make them a little bit smaller!


Throughout the course of the day, I had been checking on the pork and stirring it as needed. By the time the Black Eyed Peas were warming up their mics (and dusting off their Light Bright shoulder pads), the pork was juicy, tender and already falling apart. Adam asked me if I needed him to shred the meat, but the job was basically done and with very little effort. As soon as I would pick up a piece of pork with the tongs, the meat would literally fall apart. Perfect!


I toasted the buns, topped them with a heaping serving of pulled pork, plated up the coleslaw that Adam made, and got ready to enjoy a less than glamorous halftime show.


By the 4th quarter, it looked like the Steelers would complete their comeback, and it was time to prepare the final course of our meal. Earlier that morning I had whipped up a batch of my favorite Double Chocolate Chip cookies for the"sandwich" part of the ice cream sandwiches. I loaded them up with a generous amount of vanilla ice cream and then rolled the edges in yellow sugar to complete my fabulous "Black and Yellow" ice cream sandwiches. 


Although the outcome of the game was not what we had hoped for, the meal was even better than expected. The pierogies were a great first time attempt and even impressed a Pittsburgh native; the pulled pork was bursting with flavor and could not have been more tender; and the ice cream sandwiches were the perfect comfort as the game came to a very disappointing, and anticlimactic end. Knowing my superstitious husband though, I can't imagine he will be requesting this meal the next time the Steelers play in the Super Bowl, but I  have no doubt that all three of these courses will be made again. We will just have to wait until next year for that seventh ring.